THE PLAN:
Last Fall, we visited the Alchemist in Waterbury for dinner and some drinks. One of the great beers they had on tap was a pumpkin weizen. It was delicious! So, I vowed to try making one this Fall. I figured I'd go with a very light wheat base, use lots of pumpkin, and add some vanilla and ginger to the mix.
THE RECIPE:
6# Canadian 2 Row Pale Malt (1st use of bulk grain purchase)
6# Wheat Malt
1# Flaked Wheat
8# pie pumpkins (de-seeded, cubed, sprinkled with brown sugar, baked @ 350 for 45 minutes)
2# butternut squash
1# acorn squash
Wyeast 3068 - Bavarian Wheat
1 Vanilla bean for secondary.
10/16 BREWDAY:
First time splitting my brew into 2 days. I mashed on Friday night (with help from my buddy Ash), sparged and collected 7 gallons, threw blankets over the kettle, then boiled, cleaned, chilled, and pitched on Saturday morning. Seemed to go fine!
So this was a "fun" batch... first I had a mess dealing with my now defunct grain mill; had to have a friend bring his over (thanks Matt). I was also using a new malt for the first time, which may have contributed to some low gravity numbers... but also could have been from missing a couple mash temps.
Planned a 3 step mash:
Protein rest at 122 for 30 minutes
Sacch rest at 154 for 30 minutes (ended up about 148)
Mash out at 168 for 10 minutes (ended up about 160+/-)
Sparge at 168 (low sparge #'s)
Pre-boil gravity at 70% efficiency was supposed to be about 1.069, mine was 1.059
Second day went well... wort was at ~119F the next morning, only took about 45 minutes for it to start boiling. Simultaneously, Jen and I prepped the squash and roasted it in the over for about 45 minutes before adding it to the boil. After doing so, I boiled for an additional 45 minutes (90 total). I had added an ounce of Hallertau at 60 minutes, and left it alone after that. Whirlpooled and racked about 5.5 gallons into primary, shook for 60 seconds, then added the yeast slurry. I took great care in trying to keep the fermenting temp right at 62 the whole time. It did creep up to 66 or maybe 68... but not for long. Once I saw that, I soaked a towell in cold water and wrapped it around the carboy. It brought the temp down to 62 and stayed there the remainder of its time in primary.
10/24 - RACK TO 2ND/Vanilla Addition:
First I minced 1 vanilla bean ($0.79 @ Healthy Living) and stuck it in the freezer for awhile, then threw it in the secondary fermenter and racked 5 full gallons on top of it.
Gravity was a little hard to read, but was somewhere around 6.75 Brix/1.009. Interesting that my OG was 10 points lower than the estimate, and the FG was 10 points lower as well.
I had a taste of it... the main things that caught my attention were 1) not much pumpkin flavor at all :-S 2) I'm noticing the same type of astringent presence that was in my brown ale, and others from early this year... which I attributed to my water. I know that this was the first time I used tap water since purchasing the new water filter. I really hope it's just my imagination. That would suck.
Planning on leaving it on the vanilla bean for 5-7 days. Then I'll bottle it. Can't wait. It'll be about 2 weeks late, but oh well. I should really try to have my pumpkin ales done for the Fall (September/October). This one won't be ready until mid-November... barely in time for Thanksgiving.
11/3 CHECK IN:
This puppy's been on the vanilla for about 10 days, and is ready to be bottled, so I got everything ready to bottle and found I had less than a 1/2 cup priming sugar, so I'll need to pick more up and bottle tonight or Friday night. Gravity was at 4.75 Brix/0.997 which does not seem right. I'm going to double check it against a hydrometer reading tonight. Smelled like a wheat, no pumpkin aromas noticeable. Tasted very much like a weizen, no pumpkin, vanilla came through nicely in the finish - just the right amount. Also had a strange kind of pop rocks taste to it... almost like a seltzer or champagne... which I'm sure will go away with priming in bottles. Debating about adding some pumpkin pie spice or throwing some canned pumpkin in for an extra day or two. Really want the pumpkin flavor in there balancing with the wheat.
Sunday, October 17, 2010
Sunday, October 10, 2010
Water Woes, part II
So I've been battling with my brewing water again. I have been getting sick of paying $10 every time I want to brew for clean water. I've done a lot of research on water quality, filtering, getting reports, etc. It seems like the problem my tap water has is high amounts of chloramine, which is similar to chlorine, but not the same... and can't be treated the same either. I looked into a few different solutions, but the one I decided on was an under-sink carbon filter. It's like a big Brita filter that you never see. Apparently a carbon filter will filter out the chlorine taste and odor. I'd still kind of stuck with the chloramine, but I may try pre-boiling my brew water, or, I might just fill up a kettle and let it sit overnight. I guess a lot of the chloramine will evaporate. Anyways, I looked into several different kinds, but I finally decided on one from Lowes. It was ~$35, came with a filter, it should filter up to 2000 gallons (which the box says is 6 months) and new filters are about $12. So in a year's time, I would spend about $50 (And only $25 the following year(s)), where if I was still buying spring water, and brewing once a month, I'd be spending $96, but most likely that would be higher because I generally brew twice a month, using 8 gallons each batch.
So I got it all installed, let it run through for about 5 minutes, filled a glass and it tastes pretty good, but not great. I still feel like I can taste like wet paper towel stringiness on the back of my tongue. I feel like that's the chloramine. But who knows. This will at the very least allow me to fill up my kettle the night before more easily than measuring everything out quart by quart like I did in the past. The bottom line is this... water is the largest ingredient in my homebrew, so it better taste good going in, in order for it to taste good in the end!
Wednesday, October 6, 2010
Kegging 101... again
In my former brewing life, I had acquired some 5 gallon corny kegs, a CO2 tank, regulator, and even purchased an old fridge on ebay for $1. Here is that kegerator, circa 2005:

I left that behind when we moved up to VT in 2007. At the time of our move, I wasn't sure if I'd be brewing again, but I kept the kegs, I found out the CO2 tank was past inspection so I gave that away, but kept the regulator, and I also kept the one faucet and shank that I had for the old fridge. Since it's been a year since my brewing resurrection last summer, I opted to get back into kegging, starting with an Oktoberfest that I brewed back in April. Well... it wasn't smooth, and here is what I've learned (again):
1) Designate some time. Kegging your beer used to mean to me that conditioning was quicker. This is not true. You can get some carbonation in your beer very fast, but it lacks quality. A week is a good place to start, but I'd plan on 2 or 3 weeks, depending on the style, to reach an optimal CO2 volume.
2) Get the proper equipment - down to the right size & length of lines. It makes a difference. A big difference. Make a check list of the following:
Kegs - make sure you know if you have a pin-locks or ball-locks.
O-rings - 5 of them per keg, and make sure you have the right rings for your keg: pin-lock vs. ball-lock
Posts - These are the two pieces you'll screw onto the keg, and what you're disconnects will attach to. There are pin-lock and ball-lock types, as well as liquid and gas types. You'll need one gas and one liquid for each keg.
*A word to the wise - it seems as though pin-lock equipment is getting hard to find... if you're just starting out and are selecting these things from scratch, I would consider going the ball-lock route.
Poppets - These are the little spring-loaded pieces inside the posts, so you should get them with the posts. Their job is to open the valve when the disconnects are attached, and keep it closed when its not.
Disconnects - Again, pin-lock or ball-lock, and also gas vs. liquid... there's a difference. This attaches the proper line to the proper post.
A link for posts, poppets, and disconnects
CO tank - Choose between 5, 10, or 20 pound tanks. The initial purchase kind of sucks, but it's fairly cheap to refill. I found a 20# tank on craigslist for ~$60, got it filled for $25, and now I'm set for awhile.
Regulator - Typically, you'll want a dual guage regulator with a shut-off valve; this regulates the amount of CO2 that goes into your beer... how it works is that you set the PSI, if fills the headspace with that precise amount, and as the beer absorbs the CO2, it lets more in.
Gas lines - Should be 5 feet of 1/4" or 5/16"... I personally use 5/16" because my regulator has a large barb ;-)
Liquid lines - depending on your set up, they should be ~5' in length, and 3/16"... some people use 1/4" too, but I don't advise it.
Taps - you can get a cheap picnic tap or get yourself set up with a faucet for a fridge. Lots to choose from. If you want the faucet, you'll also need a shank, and a tailpiece.
3) Condition at dispensing temps. Gas is more soluble in colder temps. I have my fridge set at 35 right now, but I'm thinking I'll bring it up to 40. In any case, you can use whatever temp you want, just know what it is, you'll need that number when selecting the carbing PSI (#5 below).
4) Select the volumes of CO2 that is desired. This is selected by style, here is a good chart indicating each styles range: (click on image for actual website)
5) Select the PSI to be set at. Do this by taking your temp + your volumes, and locate your PSI on this chart: (click on image for actual website)
6) Put it all together, be patient, relax, have a homebrew. Hook up your gas line to your keg, turn your CO2 tank on, set it at your selected PSI, then sit back and wait.
The Details:
So, now you have the overview, let's get into details. This involves different carbonation methods, troubleshooting, maintenance, and best practices.
Carbonation Methods:
There are really two methods, but a third one that is middle of the road.
1) Set & Forget - This is where you find your ideal PSI, (lets say 11PSI for dispensing) set it there, and let it reach an equillibrium naturally. Should take 2-3 weeks.
2) MegaBurst Carb - This uses a much higher initial pressure, let's say 30PSI, and even some gas diffusion techniques such as rocking or shaking the keg to achieve a quicker solution of the gas. If you leave this on too long, you'll over shoot your ideal CO2 volume, overcarb your beer, then you'll have to start troubleshooting.
3) Burst Carb - This is the in-between way... but really it's a burst carb done right. It's still a tricky and a little risky since you have to make an educated guess. One way is to set it at 3 x's the ideal PSI for 24 hours, then drop it down to the ideal setting, purge the headspace, and let it equalize.
Here is a helpful chart that a guy on HomebrewTalk put together: (click to go to actual page)
Troubleshooting:
Hopefully you won't encounter any problems, but if you do, here are a few troubleshooting tips that might help resolve your kegging problems.
Overcarbing - If you're beer is spitting at you, then most likely you have overcarbonated it. But that's not always the reason. The first time I had this happen, I found out that my beverage line (from the keg to the tap) was too short - at 2.5". You need the proper line resistance in order to keep the gas from breaking out of solution. Even the diameter of the line was off... I was using 1/4" line, and I ended switching to 3/16". My air line was still 5/16". So check your lines.
If you did overcarb, then you basically will need to take the air off of it, and purge the headspace a few times throughout the course of a day or so. After that, hook the line back up... you can either do 12-24 hours of high PSI then switch to regular PSI... or just set it at your ideal PSI and let it alone for a few days.
Maintenance:
more info later - http://www.youtube.com/watch?v=xwbuqNS458c
Best Practices:
more info later - http://www.youtube.com/watch?v=xwbuqNS458c

I left that behind when we moved up to VT in 2007. At the time of our move, I wasn't sure if I'd be brewing again, but I kept the kegs, I found out the CO2 tank was past inspection so I gave that away, but kept the regulator, and I also kept the one faucet and shank that I had for the old fridge. Since it's been a year since my brewing resurrection last summer, I opted to get back into kegging, starting with an Oktoberfest that I brewed back in April. Well... it wasn't smooth, and here is what I've learned (again):
1) Designate some time. Kegging your beer used to mean to me that conditioning was quicker. This is not true. You can get some carbonation in your beer very fast, but it lacks quality. A week is a good place to start, but I'd plan on 2 or 3 weeks, depending on the style, to reach an optimal CO2 volume.
2) Get the proper equipment - down to the right size & length of lines. It makes a difference. A big difference. Make a check list of the following:
Kegs - make sure you know if you have a pin-locks or ball-locks.
O-rings - 5 of them per keg, and make sure you have the right rings for your keg: pin-lock vs. ball-lock
Posts - These are the two pieces you'll screw onto the keg, and what you're disconnects will attach to. There are pin-lock and ball-lock types, as well as liquid and gas types. You'll need one gas and one liquid for each keg.
*A word to the wise - it seems as though pin-lock equipment is getting hard to find... if you're just starting out and are selecting these things from scratch, I would consider going the ball-lock route.
Poppets - These are the little spring-loaded pieces inside the posts, so you should get them with the posts. Their job is to open the valve when the disconnects are attached, and keep it closed when its not.
Disconnects - Again, pin-lock or ball-lock, and also gas vs. liquid... there's a difference. This attaches the proper line to the proper post.
A link for posts, poppets, and disconnects
CO tank - Choose between 5, 10, or 20 pound tanks. The initial purchase kind of sucks, but it's fairly cheap to refill. I found a 20# tank on craigslist for ~$60, got it filled for $25, and now I'm set for awhile.
Regulator - Typically, you'll want a dual guage regulator with a shut-off valve; this regulates the amount of CO2 that goes into your beer... how it works is that you set the PSI, if fills the headspace with that precise amount, and as the beer absorbs the CO2, it lets more in.
Gas lines - Should be 5 feet of 1/4" or 5/16"... I personally use 5/16" because my regulator has a large barb ;-)
Liquid lines - depending on your set up, they should be ~5' in length, and 3/16"... some people use 1/4" too, but I don't advise it.
Taps - you can get a cheap picnic tap or get yourself set up with a faucet for a fridge. Lots to choose from. If you want the faucet, you'll also need a shank, and a tailpiece.
3) Condition at dispensing temps. Gas is more soluble in colder temps. I have my fridge set at 35 right now, but I'm thinking I'll bring it up to 40. In any case, you can use whatever temp you want, just know what it is, you'll need that number when selecting the carbing PSI (#5 below).
4) Select the volumes of CO2 that is desired. This is selected by style, here is a good chart indicating each styles range: (click on image for actual website)
5) Select the PSI to be set at. Do this by taking your temp + your volumes, and locate your PSI on this chart: (click on image for actual website)
6) Put it all together, be patient, relax, have a homebrew. Hook up your gas line to your keg, turn your CO2 tank on, set it at your selected PSI, then sit back and wait.
The Details:
So, now you have the overview, let's get into details. This involves different carbonation methods, troubleshooting, maintenance, and best practices.
Carbonation Methods:
There are really two methods, but a third one that is middle of the road.
1) Set & Forget - This is where you find your ideal PSI, (lets say 11PSI for dispensing) set it there, and let it reach an equillibrium naturally. Should take 2-3 weeks.
2) MegaBurst Carb - This uses a much higher initial pressure, let's say 30PSI, and even some gas diffusion techniques such as rocking or shaking the keg to achieve a quicker solution of the gas. If you leave this on too long, you'll over shoot your ideal CO2 volume, overcarb your beer, then you'll have to start troubleshooting.
3) Burst Carb - This is the in-between way... but really it's a burst carb done right. It's still a tricky and a little risky since you have to make an educated guess. One way is to set it at 3 x's the ideal PSI for 24 hours, then drop it down to the ideal setting, purge the headspace, and let it equalize.
Here is a helpful chart that a guy on HomebrewTalk put together: (click to go to actual page)
Troubleshooting:
Hopefully you won't encounter any problems, but if you do, here are a few troubleshooting tips that might help resolve your kegging problems.
Overcarbing - If you're beer is spitting at you, then most likely you have overcarbonated it. But that's not always the reason. The first time I had this happen, I found out that my beverage line (from the keg to the tap) was too short - at 2.5". You need the proper line resistance in order to keep the gas from breaking out of solution. Even the diameter of the line was off... I was using 1/4" line, and I ended switching to 3/16". My air line was still 5/16". So check your lines.
If you did overcarb, then you basically will need to take the air off of it, and purge the headspace a few times throughout the course of a day or so. After that, hook the line back up... you can either do 12-24 hours of high PSI then switch to regular PSI... or just set it at your ideal PSI and let it alone for a few days.
Maintenance:
more info later - http://www.youtube.com/watch?v=xwbuqNS458c
Best Practices:
more info later - http://www.youtube.com/watch?v=xwbuqNS458c
Sunday, September 19, 2010
Pumpkin Ale
THE PLAN:
Let's make another pumpkin ale, shall we? Remember last year's?
RECIPE:
8# pie pumpkins (de-stemed, de-seeded, and cut into chunks)
2# butternut squash (same as above)
1# acorn squash (same as above)
9# US Organic Pale Malt
1# Vienna
1# Munich 10L
1/2# Crystal 60L
1/2# Flaked Wheat
1/2# Light Brown Sugar
1/4# Maple Syrup
1 oz Mt. Hood (60)
1 tsp ginger root (de-skinned and grated)(10)
1/2 tsp cinnamon powder (10)
1 oz Homegrown Fuggles (0)
Wyeast 1056 - 2L starter, 30 hrs on stir plate
9/19 BREWDAY:
I'll have to add more notes, but:
1st runnings: Brix 13.5/1.055
Pre-boil: Brix 12.6/1.051
SG: Brix 14.5/1.059
9/26 CHECK IN:
Gravity: Brix 6/1.003 (??? What? Gotta be off)
10/13 BOTTLING:
Bottled 20 500mL bottles, 12 12 oz bottles, and corked 1 750mL bottle for long storage.
Gravity: Brix 6.4/1.005
10/28 TASTING:
500mL bottle, poured a deep copper color, damn near crystal clear, not a ton of carbonation, still needs a little time, even after 2 weeks in the bottle. Smelled of squash, ginger, and alcohol. Uh oh. Tasted of the same elements. Tasted very high in alcohol. Gravity suggests this is about 7%, seems to be higher. Ginger and squash are over the top. Too much of each. I'll need to go back and check how much ginger I used last year, because it shouldn't be that different from last year. My recipe for this year says 1 tsp, but I think I put in 1 oz. Hhmmm. Hoping that these flavors will mellow with some time. Same with the alcohol. Will check back later in a month or so.
Let's make another pumpkin ale, shall we? Remember last year's?
RECIPE:
8# pie pumpkins (de-stemed, de-seeded, and cut into chunks)
2# butternut squash (same as above)
1# acorn squash (same as above)
9# US Organic Pale Malt
1# Vienna
1# Munich 10L
1/2# Crystal 60L
1/2# Flaked Wheat
1/2# Light Brown Sugar
1/4# Maple Syrup
1 oz Mt. Hood (60)
1 tsp ginger root (de-skinned and grated)(10)
1/2 tsp cinnamon powder (10)
1 oz Homegrown Fuggles (0)
Wyeast 1056 - 2L starter, 30 hrs on stir plate
9/19 BREWDAY:
I'll have to add more notes, but:
1st runnings: Brix 13.5/1.055
Pre-boil: Brix 12.6/1.051
SG: Brix 14.5/1.059
9/26 CHECK IN:
Gravity: Brix 6/1.003 (??? What? Gotta be off)
10/13 BOTTLING:
Bottled 20 500mL bottles, 12 12 oz bottles, and corked 1 750mL bottle for long storage.
Gravity: Brix 6.4/1.005
10/28 TASTING:
500mL bottle, poured a deep copper color, damn near crystal clear, not a ton of carbonation, still needs a little time, even after 2 weeks in the bottle. Smelled of squash, ginger, and alcohol. Uh oh. Tasted of the same elements. Tasted very high in alcohol. Gravity suggests this is about 7%, seems to be higher. Ginger and squash are over the top. Too much of each. I'll need to go back and check how much ginger I used last year, because it shouldn't be that different from last year. My recipe for this year says 1 tsp, but I think I put in 1 oz. Hhmmm. Hoping that these flavors will mellow with some time. Same with the alcohol. Will check back later in a month or so.
Labels:
acorn,
all grain,
brewing,
brown sugar,
butternut,
fall,
fuggles,
ginger,
harvest,
homebrew,
hops,
maple syrup,
mystery hops,
pumpkin,
squash,
wheat
Monday, August 23, 2010
Nittany Amber Ale
THE PLAN:
Last year an old fraternity brother and fellow homebrewer alerted me that Midwest Brewing Supplies had a stash of Nittany Ale bottles, which came from a now defunct brewery in Philly called Independence Brewing. Having lived in State College PA for 12 years, going to Penn State, and pretty much growing up on it, this was a no-brainer. I ordered 2 cases, and had hoped to brew something for football season. I also have been having a desire to try and brew a nice balanced amber ale, so I thought the two would go well together and here we are...
I had the opportunity to steward our local homebrew competition in May, and the first category I helped with was American Ale, which includes American Pale, Amber, and Brown ales. I've never really thought about amber ales too much, but they are awesome. They're a great balance between hopiness and sweet maltiness. It's an overlooked style, not too many commercial examples, although they are often referred to as a red ale, which I feel like don't have the hops that amber does. My recipe is based off of Jamil's brewing classic styles recipe, with a few changes due to availability at my local homebrew shop.
RECIPE:
OG: 1.057
FG: 1.014
ABV: 5.63%
IBU: 33.46
SRM: 14.6
9.25# US Organic 2 Row Pale Malt
1.00# Munich (10L)
0.75# Crystal 60L
0.25# Crystal 90L
0.25# Special B (150L) (in place of a 120L Crystal)
0.5# Victory
0.5 oz Columbus (60)
1 tsp Irish Moss (15)
0.5 oz Cascade (10)
0.5 oz Centennial (10)
0.5 oz Cascade (flame out)
0.5 oz Centennial (flame out)
Wyeast 1056 American Ale
Mash: Single infusion, target strike temp - 154/156, 60 min mash
Boil: 60 min
8/22 BREWDAY:
Tried to start around 8AM, but had a lot of problems getting my initial strike water at the right temp (heated too high, then let go too low, then reheated, then too low when added to heated mash tun, etc)... so I finally doughed in about 10AM. My initial temperature was also low, about 148, and I really wanted to get up around 154 or 156. I added 3 qts boiling water, which only brought it up to about 151, then added 5 qts boiling which raised to 158, so I added 1 qt room temp water and we settled at 156. This all happened over the span of 30 minutes, so each addition was a mini-step. The first was 15 minutes in, so I'm sure a lot of conversions had already happened before it raised to 151, then another 10 minutes went by, and finally sat on 156 for 30 minutes.
I collected 4.25 gallons of first runnings, BRIX - 14.75/1.060. I added 3 gallons of 182F sparge water, and surprising the temp only got up to 158... which was 10 degrees off of where I wanted to be. Next time - 190F at least. I let that sit for a few minutes, then collected a total of 6.25 gallons. Pre-boil BRIX - 13/1.053. Target was 1.050, so I hit it.
Boiled for 60, added 1/2 oz. Columbus at 60, 1/2 oz. Centennial & 1/2 oz. Cascade @ 10, Irish moss @ 5 (should have been 15, but forgot, almost forgot completely), and then 1/2 oz. Centennial & 1/2 oz. Cascade @ flame out.
I whirl-pooled the wort before starting to chill, and I will absolutely do this every time now, it really worked well. I've never had such clear wort come out of my boil kettle. Only a little hop gunk at the beginng (which went into a separate pan) and some at the end. Ended with 4.75 gallons... not as much as I was hoping, but oh well, close enough.
I never had time to make a yeast starter, and embarrassingly enough, I had my Wyeast 1056 packet popped and expanded for almost a week... which is way too long. I figured it was contained and we'll just see how it works. I chilled the wort to 70, shook the carboy for 1 minute, then added the 1056. I checked this morning (8/23), only 12 hours after pitching and there was activity going already. Sweet.
Hoping to transfer this quickly, and get it bottled by Friday or Saturday of this week... more later...
9/1 GRAVITY CHECK - TRANSFER TO 2ND:
The goal was for this beer to be ready for Barrett's b-day party & Penn State game against Alabama (September 11). I know I need a week to 10 days to let it condition in the bottles, so today is the day. Gravity checked in at 7.4 Brix/1.013... that's 1 point below the estimate. Perfect. Aroma was mildly hoppy, a little malt... taste was wicked bitter! But that subsided and a nice smooth malt flavor finished... nothing too sweet either which was a concern of mine. The only issue is clarity. This is a very muddy beer. I could possibly run it through a filter before I bottle... but that might be too complicated. If clarity ends up being the only issue, that's fine by me. This is definitely tastey!
Jen helped me bottle these babies... got about 44 Nittany Ale bottles filled, and 3 regular brownies in case I submit to any homebrew comps, so 47 in all. Not bad considering I only racked about 4.75 gallons. And now we wait...
11/27 TASTING:
Time has gotten away from me... lots of stuff happening in the Fall, so this is the first I've had time to post my thoughts. I am very pleased with this. Classic amber ale, crystal clear, balanced hop aroma and bitterness with malt flavor and sweetness. I have a few bottles of this left and I'll savor every one of them. This has definitely made its way into my annual line up. On this day (11/27) we played our last game of the season and I watched Michigan State clean up on us. I took the pic above too.
Next update will be after the VT homebrew comp in May. Want to sponsor this beer? :-)
Last year an old fraternity brother and fellow homebrewer alerted me that Midwest Brewing Supplies had a stash of Nittany Ale bottles, which came from a now defunct brewery in Philly called Independence Brewing. Having lived in State College PA for 12 years, going to Penn State, and pretty much growing up on it, this was a no-brainer. I ordered 2 cases, and had hoped to brew something for football season. I also have been having a desire to try and brew a nice balanced amber ale, so I thought the two would go well together and here we are...
I had the opportunity to steward our local homebrew competition in May, and the first category I helped with was American Ale, which includes American Pale, Amber, and Brown ales. I've never really thought about amber ales too much, but they are awesome. They're a great balance between hopiness and sweet maltiness. It's an overlooked style, not too many commercial examples, although they are often referred to as a red ale, which I feel like don't have the hops that amber does. My recipe is based off of Jamil's brewing classic styles recipe, with a few changes due to availability at my local homebrew shop.
RECIPE:
OG: 1.057
FG: 1.014
ABV: 5.63%
IBU: 33.46
SRM: 14.6
9.25# US Organic 2 Row Pale Malt
1.00# Munich (10L)
0.75# Crystal 60L
0.25# Crystal 90L
0.25# Special B (150L) (in place of a 120L Crystal)
0.5# Victory
0.5 oz Columbus (60)
1 tsp Irish Moss (15)
0.5 oz Cascade (10)
0.5 oz Centennial (10)
0.5 oz Cascade (flame out)
0.5 oz Centennial (flame out)
Wyeast 1056 American Ale
Mash: Single infusion, target strike temp - 154/156, 60 min mash
Boil: 60 min
8/22 BREWDAY:
Tried to start around 8AM, but had a lot of problems getting my initial strike water at the right temp (heated too high, then let go too low, then reheated, then too low when added to heated mash tun, etc)... so I finally doughed in about 10AM. My initial temperature was also low, about 148, and I really wanted to get up around 154 or 156. I added 3 qts boiling water, which only brought it up to about 151, then added 5 qts boiling which raised to 158, so I added 1 qt room temp water and we settled at 156. This all happened over the span of 30 minutes, so each addition was a mini-step. The first was 15 minutes in, so I'm sure a lot of conversions had already happened before it raised to 151, then another 10 minutes went by, and finally sat on 156 for 30 minutes.
I collected 4.25 gallons of first runnings, BRIX - 14.75/1.060. I added 3 gallons of 182F sparge water, and surprising the temp only got up to 158... which was 10 degrees off of where I wanted to be. Next time - 190F at least. I let that sit for a few minutes, then collected a total of 6.25 gallons. Pre-boil BRIX - 13/1.053. Target was 1.050, so I hit it.
Boiled for 60, added 1/2 oz. Columbus at 60, 1/2 oz. Centennial & 1/2 oz. Cascade @ 10, Irish moss @ 5 (should have been 15, but forgot, almost forgot completely), and then 1/2 oz. Centennial & 1/2 oz. Cascade @ flame out.
I whirl-pooled the wort before starting to chill, and I will absolutely do this every time now, it really worked well. I've never had such clear wort come out of my boil kettle. Only a little hop gunk at the beginng (which went into a separate pan) and some at the end. Ended with 4.75 gallons... not as much as I was hoping, but oh well, close enough.
I never had time to make a yeast starter, and embarrassingly enough, I had my Wyeast 1056 packet popped and expanded for almost a week... which is way too long. I figured it was contained and we'll just see how it works. I chilled the wort to 70, shook the carboy for 1 minute, then added the 1056. I checked this morning (8/23), only 12 hours after pitching and there was activity going already. Sweet.
Hoping to transfer this quickly, and get it bottled by Friday or Saturday of this week... more later...
9/1 GRAVITY CHECK - TRANSFER TO 2ND:
The goal was for this beer to be ready for Barrett's b-day party & Penn State game against Alabama (September 11). I know I need a week to 10 days to let it condition in the bottles, so today is the day. Gravity checked in at 7.4 Brix/1.013... that's 1 point below the estimate. Perfect. Aroma was mildly hoppy, a little malt... taste was wicked bitter! But that subsided and a nice smooth malt flavor finished... nothing too sweet either which was a concern of mine. The only issue is clarity. This is a very muddy beer. I could possibly run it through a filter before I bottle... but that might be too complicated. If clarity ends up being the only issue, that's fine by me. This is definitely tastey!
Jen helped me bottle these babies... got about 44 Nittany Ale bottles filled, and 3 regular brownies in case I submit to any homebrew comps, so 47 in all. Not bad considering I only racked about 4.75 gallons. And now we wait...
11/27 TASTING:
Time has gotten away from me... lots of stuff happening in the Fall, so this is the first I've had time to post my thoughts. I am very pleased with this. Classic amber ale, crystal clear, balanced hop aroma and bitterness with malt flavor and sweetness. I have a few bottles of this left and I'll savor every one of them. This has definitely made its way into my annual line up. On this day (11/27) we played our last game of the season and I watched Michigan State clean up on us. I took the pic above too.
Next update will be after the VT homebrew comp in May. Want to sponsor this beer? :-)
Tuesday, August 17, 2010
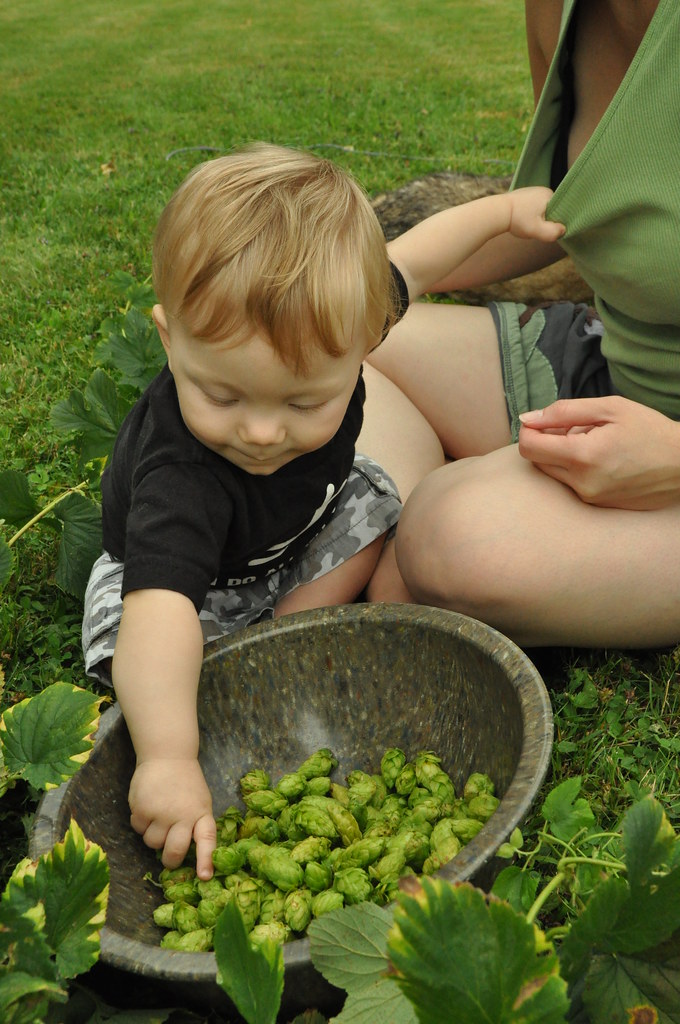
2010 Hop Harvest, year 4
Year four of my homegrown hops is just about over. I've been working on getting my hops harvested this week, probably should have done it at the beginning of August, but, this was the first chance I was able to. Even still, I've doubled everything that I harvested last year.2010 Hop Harvest #'s
Tettnang: Wet - 19.25 oz.; Dry - 4.5 oz. (77%)
Fuggles: Wet - 13.0 oz.; Dry - 3.25 oz. (75%)
Saaz: Wet - 4.5 oz.; Dry - (1.25?)
Compared to 2009:
Tettnang: Wet - 9.0 oz.; Dry - 2.125 oz.
Fuggles: Wet - 5.125 oz.; Dry - 1 .25 oz.
Saaz: Wet - 2.5 oz.; Dry - 5/8 oz.
I did grow the same hops in 2007 & 2008, but since I wasn't brewing much at all then, I did not keep track of my numbers. I had big plans to expand my "hop yard" to include four new varieties: Chinook, Mt. Hood, Hallertau, and Goldings. I had them in planters, never got a new trellis set up, so they never got in the ground and eventually ended up in the compost pile. One big thing plaguing my plans is whether we are staying at our current location or moving. We have been looking to buy a house since March so that has postponed all permanent projects. Hopefully I'll know before the ground freezes, I'd like to get my current hop plants out of the ground and into their new spot so they can rock out in the spring, and be able to get my trellis set up and set (cement in the ground before it freezes). We shall see!
Sunday, August 1, 2010
Heather Ale
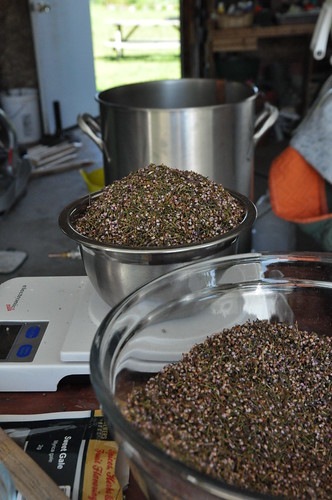
The Plan:Not sure where I heard about Heather Ale's first - Sacred & Herbal Healing Beers, or through my wife's Scottish roots. Either way, I stumbled on Fraoch last fall and really dug it. Was going to brew one last year, but for some reason decided to wait and brew one at the end of this summer to have for the fall... and for the Quechee Scottish Festival! The biggest issue with this beer is sourcing the heather. The Fraoch recipe calls for 1.25# of heather blossoms. I only have access to dried heather tips. I know that the blossoms would probably taste a heck of a lot better... but I decided to go with the dried ones for now until I can source some fresh ones.
Check out this YouTube video about the brewing process of Fraoch:
THE RECIPE:
10# UK Pale Malt
1# Crystal 60L
1# Biscuit
1/2 oz Cascade (6%)(90)
1/2 oz EKG (15)
8 oz Dried Heather Tips
1 oz Sweet Gale
Wyeast 1728 Scottish Ale
8/1 BREWDAY:
Mash - 15 qts @ 153F for 90 min.
(No mashout) Collected
Sparge -
Collected
Pre-boil gravity: Brix 13/1.053
Boil: 90 minutes, with the following additions:
@90 - 4 oz. heather, 1 oz. sweet gale, 1/2 oz. Cascade
@15 - 1oz. heather, 1/2 oz. EKg, 1 tsp Irish moss
@5 - 1 oz. heather
@flameout - steep 1 -oz. heather for 1 hr.
Collected 5.0 gallons
SG = 14.2/1.057
8/22 BOTTLING:
FG: 7/1.010
I was in a bit of a rush to get these ready for the Quechee festival... I really should have transferred this to secondary and let it rest for another week... and I really should have had some more conditioning time under it's belt because it wasn't ready on the 28th like I had hoped.
With some help from Jen, we bottled 24 22 oz bottles and 14 12 oz. bottles.
Friday, July 23, 2010
Rhubarb Berliner Weisse
The Plan:Earlier this year, I started getting more into sour ales. Not completely, but a bit here and there. I think it started with Magic Hat's Odd Notion this past winter. Long story short, I was thinking about brewing a sour ale when I met Amy, a friend and relative of one of my wife's co-workers. She's into beers and brewing and actually works at Magic Hat now. She had an idea to pair rhubarb with a sour ale given its tartness. I liked the idea, and when I started researching to see what a good style would be, I thought something sweet might be best. Almost right away, I landed on a Berliner Weisse, and of course when I punched in "Rhubarb Berliner Weisse", I found a few people had already come up with this pairing, go figure. Oh well, we'll give it a shot anyways!
Amy had access to a bunch of rhubarb so she grabbed a few pounds and froze it. I did some research on the best way to brew a berliner, and came up with a few options: decoction, single infusion, sour mash, no boil, short boil, full boil, lactobacillus + US-05, wyeast berliner blend, add lactic acid at end, etc. Lots of ways to do this. I decided I didn't want to mess with a sour mash because I didn't want to contaminate my cooler with any little buggers. I kind of liked the idea of just using the Wyeast blend eventhough a bunch of people said the '08 version didn't give enough tartness. I'm hoping that the 2010 version has corrected that, so I'll put my trust in them. I pretty much based my recipe off of Jamil's recipe in Brewing Classic Styles, and would just add some rhubarb to secondary when the time comes.
THE RECIPE:
5 Gallon batch
OG: 1.032
FG:
ABV:
IBU: 7
SRM:
4# German Pils
4# German Wheat
1 oz. Hallertau
3# Rhubarb, cut into 1/4" chunks and frozen, to be added in secondary
Wyeast 3191 - Berliner Blend (Private Collection)
7/23 BREWDAY:
This was a pretty busy day. Dave came over and so did Amy. We started the day off with bottling the saison into a bunch of 750 mL Belgian beer bottles, corking them, and winding down a wire basket on top. While we were doing that, I started heating the strike water.
Mash:
Single Infusion, mash @ 149/150 for 90 minutes
Strike - 10 qts @ 164
After 60 minutes, temp had slipped to about 146, added 3 qts 180F to raise up to 149.
After 90, collected 2 gallons, first runnings Brix 14/1.057
Sparge w/ ~4 gallons @ 168, pre-boil gravity - 8/1.032
Boiled for 15 minutes, added the Hallertau right at the beginning of the boil.
Chilled, took temp readings every minute... got to 69.9 in 31 minutes.
Did not make a yeast starter this time, figured the Activator pack for this low of gravity would be enough. Pitched about midnight.
Checked @ 10AM the next day, absolutely flat.
Checked @ 6PM, clean white froth forming.
Checked @ 11PM, comletely blew out of blow tube... so it's working :-)
More later...
4/27 RACKED TO A QUICK 2ND:
Wow, it's been a long time since I brewed this. Just over 9 months now. I finally had a taste of a real Berliner (1809) and was happy to see a lot of similarities. The main areas that were different were color - the 1809 was a shade darker; and tartness - again the 1809 was a little more tart. I went through a lot of scrambling to try and doctor mine up a bit using lactic acid. I also still had the idea of making rhubarb syrup to include with the bottles for the homebrew competition, but was told at length why logisitically it wouldn't work. So in the end, I decided to go back to the original idea of the Rhubarb Berliner. I thawed out the rhubarb I had int he freezer, compressed and collected all the juice. I sanitized a keg, threw the juice in, then racked the beer on top. This is only going to stay in here for a day or so, really not a lot of time to infuse, but it's got to be bottled and submitted to the homebrew comp by Friday. Gulp. The beer itself, with the rhubarb, is almost perfect now. The tartness of the rhubarb has helped out with that aspect greatly. The one thing that I'm worried about now is carbonation. I'm assuming that 9 months has dropped out all of the viable yeast. I'll have to do some more research before I bottle, knowing whether to add some additional yeast or not.
A review from Mr. Don Osborn:
Saturday, July 10, 2010
Cranberry Oak Bark Tripel
THE PLAN:Last year I tried something crazy... I brewed a 1 gallon experimental batch of an oak bark ale, based off of a recipe in Sacred and Herbal Healing Beers. I liked how it turned out for the most part... with some minor adjustments, I think I could make a really killer 2nd version of it, all grain and 5 gallons this time. I decided that the base beer I'd use was a Belgian Specialty Ale or maybe a Belgian Tripel... very close styles. I used some cranberries in it last time to balance out the dry oaky taste, and I plan to use them again. With the oak, I thought I'd use some oak cubes in the secondary to add a little more oak flavor to the mix. So here we go...
THE RECIPE:
15# Belgian Pilsner
3/4# Caravienne
1/4# Aromatic Malt
2# Table Sugar
1 oz Fuggles (60)
1/2 oz Willamette (15)
1/2 oz Fuggles (10)
24 oz Craisins
24 oz Fresh Cranberries
Lightly Toasted Oak Chips (not sure how much I'm adding)
7/10 BREWDAY:
Brewday was mayhem. I nailed my strike temp, and it stayed exactly where it was supposed to be for the full 90 minutes. BUT, somehow my gravity was way way lower than what was projected, even at 65% efficiency. I was freaking out a bit. But, I chilled, collected 7 gallons of wort and decided to do a 2 hour boil, plus I still had 2#'s of table sugar to add. Pre-boil gravity was 1.044, after 2 hr boil and addition of 2#s of sugar, SG was 1.082
7/23 RACKED TO 2ND:
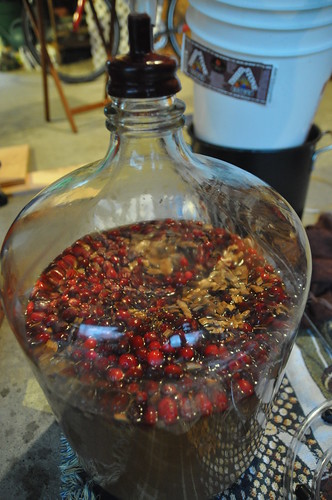
Time to get this puppy on the oak & cranberries. I added 24 oz. of craisins, 24 oz. of fresh crushed cranberries, and about an ounce of light toast french oak chips to the bottom of a freshly sanitized carboy, then racked the tripel on top. Planning on keeping it on here for about a week. Gravity check before adding it on top of the cranberries was 8/1.002... whoa!
7/31 GRAVITY CHECK: Rose to 10/1.015, so the cranberries did add some sugar!
8/1 RACKED TO 3RD:
Another gravity check shows that it went down to 9.6/1.012, racked it off of the cranberries and oak. This tastes amazing! Still a little sweeter than I wanted, but has a nice warming dry finish. Can't wait for Thanksgiving!
8/7 GRAVITY CHECK: Down to 9.2/1.010
8/22 GRAVITY CHECK: Down even further now - 8.2/1.003
Planning on bottling soon, going to do the 750mL belgian corked bottles like I did for the saison. And then we'll keep our mitts off of these until Thanksgiving!
9/19 BOTTLING:
Was brewing my pumpkin ale today and had some time to bottle this batch. I tried to used as many Belgian 750mL bottles as possible, and a few 12 oz.
11/10 TASTING:
Did a thai dinner tonight with Dave & Megan and decided to pop one of these open to see how it's coming along. TRAGEDY... it appears that they're not carbonated at all. :-( Did something happen or did I pull a major faux pas and forget to add priming sugar before I bottled :-S Oh god, say it ain't so.
11/11 RE-TASTING:
Tried another bottle, this one was a 12 oz capped bottle - same result... nothing at all. BARNACLES!!! I'm going to test one more and see if it produces the same results. If it does, then I'm going to have to do one of two things: 1) open every bottle up, throw some carb tabs in, then recap/recork and wait another couple of weeks. 2) open every bottle up, mix up some priming sugar, and distribute between all of them OR pour them all back into the racking bucket and re-rack to bottle, cap/cork, and wait a couple of weeks. I would just choose the former of the two options, but I've experienced some problems recently with the carb tabs I have. I carb tabbed some Oktoberfests and Brown Rice Lagers and they came out flat and had chunks of the tabs floating around. Then there's the question of adding more yeast. Oh, and there's the added bonus of not having enough corks and hoods to re-cork this batch. I'll have to either drive an hour to Plainfield to buy more, or order some online. Did I mention how much this sucks?
Saturday, June 12, 2010
Saison de la Dolan ;-)
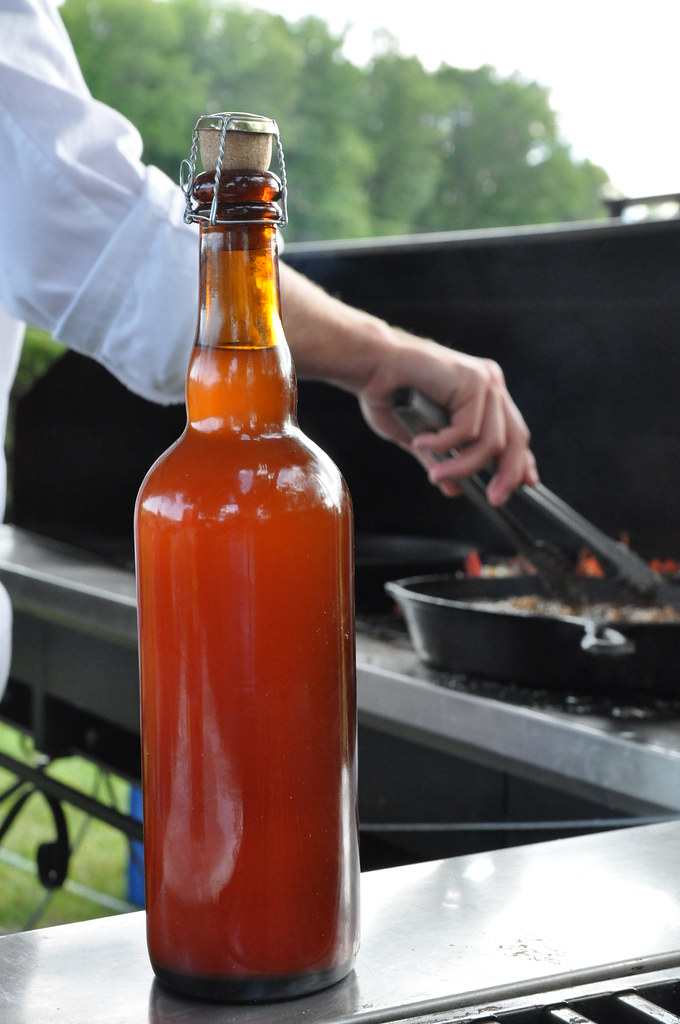
THE PLAN:The gameplan for this one was top secret for awhile... our friends Rob & Kristina were getting married in August, and had asked my good friend Dave to cater the wedding. He came to me with the idea of brewing a beer for the wedding, not for the whole wedding, but for the bride, groom, wedding party, and cooks. Additionally, I suggested we cook with the beer too. He went through his projected menu and I thought the best style for the event & menu & time of year would be a traditional french/belgian saison. I also thought it would be a great chance to try corking some 750mL belgian beer bottles too. The biggest obstacle I knew we were facing was time. That style is known for a tricky yeast that usually take 4-6 weeks to finish fermenting, and needs super high temperatures too. I also knew that we would need 2-4 weeks of conditioning time for those bottles to carbonate properly. Well, to my great pleasure, everything turned out great.
THE RECIPE:
9# Belgian Pilsner 2 Row Malt
2# Vienna Malt
1# German Wheat Malt
1# Rye Malt
1/2# Flaked Wheat
1/2# Flaked Oats
1/2# Light Brown Sugar (wasn't planned, added it on a whim)
1/2# White Sugar (whim again)
1 oz. Perle (60 minutes)
1 oz. Styrian (10 minutes)
1 oz Styrian (5 minutes)
1/4 oz fresh grated ginger
1/8 tsp paradise seeds
Wyeast 3724 - Belgian Saison (1 L starter for 12 hours on stir plate)
6/11 BREWDAY:
Planned a low & slow mash for this one... 90 minutes @ 148-150F. 90 Boil as well.
17.5 qts @ 162F --> doughed in, temp adjusted to between 146 & 150. Covered up and checked at 3 x 30minutes intervals, temp was right on the money the whole time... I love this mash tun (48 qt. igloo cooler).
Tried to mashout with 11 qts of 200F water... temp only raised to about 165F. Let go for 10 minutes, then started sparging with 1/2 gallon of 180F water... didn't raise the bed temp up at all... and it all pretty much got absorbed. Collected about 5.5 - 6 gallons, Brix @ 12/1.048... target was 1.054. Sparged another gallon, collected 1/2 gallon to get 6.5 total gallons.
Added 1/2# light brown sugar and 1/2# white sugar to raise gravity. Brix now @ 14/1.057.
Boiled for 90 minutes, with hop & spice additions.
Cooled with IWC, Brix @ 18.25/1.075, target was originally 1.065. I went back and added the sugar into the program and now it gave me SG as 1.074, so still right on the money.
Cooled to 75, pitched yeast slurry, put to bed, and cleaned up.
I'm planning on fermenting this one out for about a month, in an upper bedroom where the temps get nice and toasty - usually in the 80's during the day, and stays in the 70's at night. It's not constant, but it's the best I can do for now.
7/10 GRAVITY CHECK:
It's been a month, so I thought I'd check in to see where the gravity is. 13 Brix/1.039... damn. This really didn't get far. After some discussions on the BA Homebrew board, I decided to put this puppy out in the garage for another week of hot and steamy temps that will hopefully kick it back in enough to finish it off. I also sanitized my hands and shook the carboy for a couple minutes to get the yeast stirred up. The people on the boards said give it another 2 weeks... but I'm running out of time, so we'll see.
7/16 GRAVITY CHECK:
10.5/1.022 - Still not where I want it, but getting closer. I have to source some corks and hoods for the 750mL bottles I plan to use, so I'll let it go a little longer.
7/20 GRAVITY CHECK:
10/1.019... it might be under 10 a bit... but it's getting close now. I think the estimated FG was supposed to be around 1.016, so if it dropped 3 points in 4 days, then hopefully it will finish off by Friday (the 23rd), and if not, I really need to bottle these to have them ready in time for what their original purpose was - a wedding gift!
7/21 CORK CHECK:
I had decided that I wanted to bottle this batch in 750mL Belgian Beer bottles that would also need to be corked. With some quick research, I saw that a bag of 30 corks was about $8, wire hoods to tie down the corks were about $15 per 60, and I would need a floor corker in order to make this happen. Shit. That's about $25 extra bucks plus I'd have to find a floor corker. It was a little unreasonable to try and buy a floor corker just for this batch... they run anywhere between $75 & $150. I did some searching and was able to borrow an Italian floor corker from a guy in the Green Mountain Mashers. There was still a little finagling on how to position the corker right so that only half of the cork got inserted. Ended up just putting the metal disc to the bottom of the bolt, then adding a #6.5 holed-stopper on the end. It took about 6 tries to get the depth correct though. I also ended up driving out to Plainsfield to visit Local Potion, since they had the right type of corks and VT Homebrew did not. While I was there, I also discovered they had some used Portuguese floor corkers from a local winery that they were selling for $20. The Portuguese corkers are a little smaller than the Italian ones, and seem like they are really only for wine bottles/corks. We tested a few with no
luck, but I still got it hoping I could make it work somehow. Turns out, after about an hour of hankering, the hole that's between the cork and the bottle is sized for a wine cork. It looks like I could drill a larger hole, enabling it to work for the bigger belgian corks. But, for this batch, I'll use the larger Italian floor corker and mess with the other one later... or trade it back in towards an Italian corker they have there as well.7/23 CORKING:
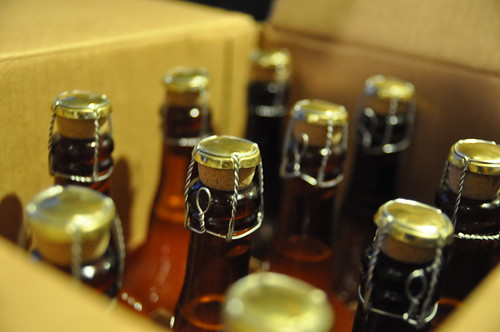
Even with all the trials and tribulations with the corkers, the actual corking process went fast & smooth. I had Dave helping fill the bottles, I would put the corks in, and our friend Amy was putting the wire baskets or hoods on. We got about 19 bottles corked, they looked awesome! So now we wait.
8/6 FIRST TASTE:
The wedding is tomorrow, so I decided to bust one out and see what it was like. I had it chilling in the fridge for about 4 or 5 hours. It poured beautifully! And the taste was spot on! Doin the happy dance :-)
8/7 THE WEDDING:
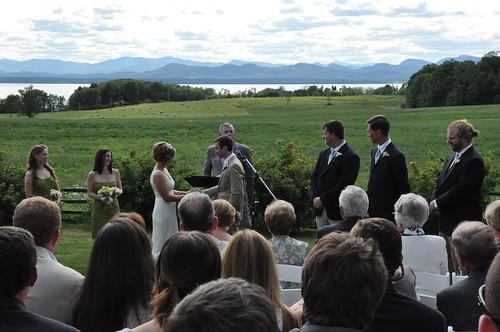
I was excited to give this to the happy couple, and what a day it was. Perfect weather, amazingly beautiful scenery overlooking Lake Champlain on the historic Shelburne Farms Brickhouse. Dave decided to use the beer with the mussels, and I opened a few bottles for the bride & groom. They loved it! I stashed one away for them to open on their anniversary next year, it will be exquisite.
Subscribe to:
Posts (Atom)