 | |
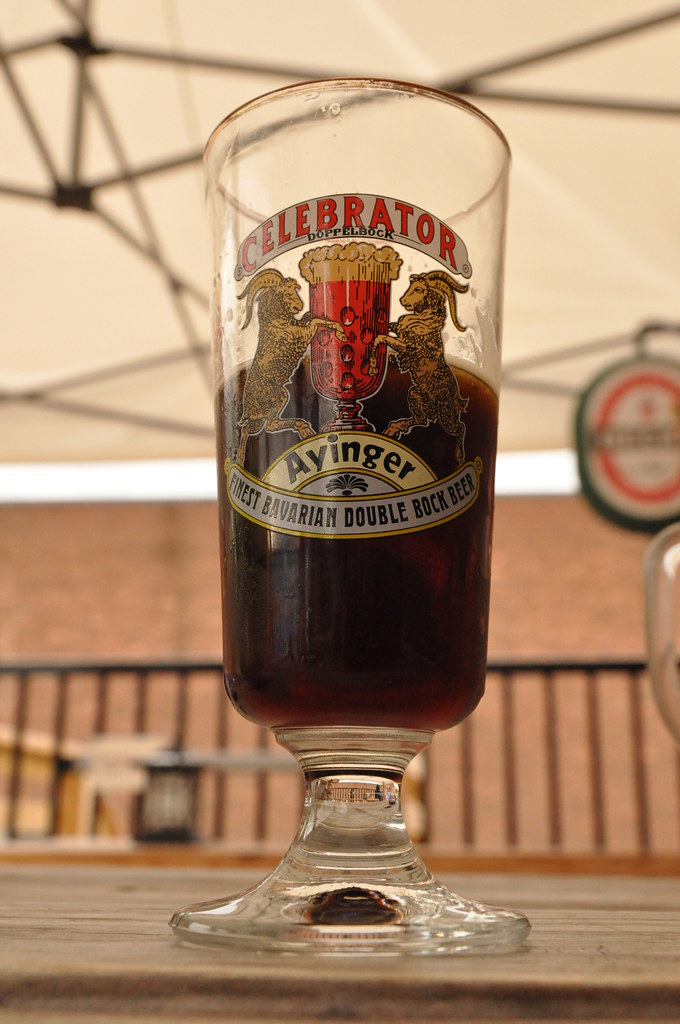
| Mmmm, Celebrator. |
My friend and brewing co-hort Matt and I have many things in common, but one of them is that we are suckers for Bavarian Doppelbocks. We have been talking about doing a batch of beer together, and simultaneously, we have been talking about experimenting with a historical brewing style called decoction. Doppelbock happens to be one of those styles that was traditionally a decoction mash, so we decided to not only do a decoction mash for a batch of doppelbock, but we would do two mashes, one as a double decoction and one as a single infusion batch sparge. The main idea is to brew both identically in every way except the mash styles, and then compare the final results.
THE RECIPE: (this is for a 3 gallon batch, we'll be using this for each), basically taken from Brewing Classic Styles.
7# Munich
2# German Pils
1# CaraMunich III
3/4 oz Hallertau (60)
1/4 oz Hallertau (30)
2 Activator packs of Wyeast Hella Bock 2487, 2L starter on stir plate, stepped up to 1gal, refridgerated and decanted. Had about 1&1/2 cups of yeast for each 3 gallon batch.
2/13 BREWDAY:
What a freakin day it was. The infusion mash went smooth, the decoction mash... not so much, but they both ended up fine.
Infusion Mash
Decided, after much debate, to do a single infusion mash rather than a double infusion for sake of time and effort. 12.5 qts to 10# grain, strike @ 155 for 60 minutes. After an hour, we only lost about 2 degrees. Collected ~3.5 gallons first runnings @ 16 Brix/1.065, collected another gallon or so at 9 Brix/1.036. Total pre-boil volume was about 5 gallons (1/2 gallon more than what we were shooting for) and our pre-boil gravity was 13.8/1.056. We boiled down to 4 gallons, then threw in our first hop addition and proceeded through to knock out. Chilled down to 48F, pitched the yeast, and let sit outside for about a 1/2 hour to chill down a little more. Only went down about 2 degrees. It's now sitting on the floor of my basement (ambient temp is 53F +/-) and seems pretty steady at 52F. 2.75 total gallons, OG Brix 19.4/ hydrometer 1.084. Doughed in at 11AM, pitched yeast at 5PM.
Decoction Mash
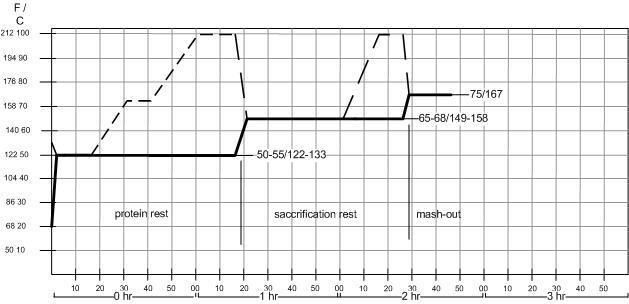
Brewday thoughts:
What a long day, we started milling grains and measuring/heating water at 9:30 AM, and I pitched the 2nd yeast at 8:30PM and still had an hour or more of clean up to do. So easily 12 hours. Matt projected a 10 hour day, and I was like "no waaaayyyyy, we got this in 6 or 8 easy!" Errrr, big swing and a miss, B. There are a lot of numbers up there in those two mash schedules, but not much description of what was going on. The infusion mash seemed like any other mash, sweet, bready malt aromas and typically colors. The decoction was pretty interesting to watch, smell, and taste. The wort got really dark and cloudy. Lots of caramel aromas, chocolate, etc. It looked & felt thick, even though it was a 2:1 ratio. The starting gravities were about 10 points different which is a little disappointing, but that's fine. Our biggest frustration was how to figure out what exactly 1/3 of the total mash looks like, and in turn not hitting getting our first step to raise the overall temp up to where we needed it to be. I think if we could figure that out, I'd be interested in doing this style again... I think. We may be perfectly happy with the results we get with the simple single infusion batch sparge method too that took 4 hours less time. If the decoction produces a far superior beer (which I'm doubting), then I would probably opt to do it for the styles that lend themselves to it - bocks, hefs, etc. We shall see! But honestly, I'm thinking about what to do next with this style.
2/21 CHECK-IN:
Activity has slowed way down, but still some churning going on. Temps are about 50. I took a small sample of each out this morning to test gravity. My hydrometer broke during the last brew, so this is just a refractometer reading that's been adjusted using one of these worksheets I have.
Infusion - Brix 13.6 = 1.039
Decoction - Brix 13.6 = 1.032
I retested them twice since I got the same reading for both, which is pretty crazy. The infusion one smelled great, just like Celebrator. The decoction one really didn't. I have a bit of a cold still so my smells are a bit off anyways, so I wouldn't put too much stock in my sense of smell right now.
3/27 RACK TO KEG (LAGERING)
Many moons passed due, I finally got around to racking these two to kegs in order to lager them a bit. I pulled a few samples for hydrometer readings, and for some taste evaluation as well. The infusion one was fairly nice - clear, dark ruby, smelled and tasted to style. The decoction... not so much. Not sure how to describe it, but it didn't taste great. It was much hazier too... and there was a lot of junk floating around in there too... grain & hop trub, proteins, etc. Gravities of each were kind of surprising: Decoction = 1.020; Infusion = 1.031. The decoction's was right one (even though it tasted awful), but the infusion batch's (which looked, smelled, and tasted great), was pretty high. It should be around 1.025 or 1.020. Matt and I will have to put our heads together and think about this a bit.
More later...


